support@meisterdrucke.com  ·  0043 4257 29415

Deutsch English Italiano Español Français Nederlands Português Svenska Polski Dansk
Search by artist, work title or style – e.g. Monet, Starry Night, Impressionism, Hokusai wave, nude. Describe the scene – e.g. green meadow, abstract with lots of red, dark oil painting, standing nude next to a tree.

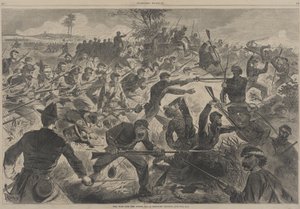
The Highlanders capturing Cawnpore 1857 AD by William Heysham Overend

The Highlanders capturing Cawnpore 1857 AD

(The Highlanders capturing Cawnpore 1857 AD )


William Heysham Overend

€ 136.87
Includes 13.5% VAT
   Configure art print
Undated  ·  Lithograph  ·  Image ID: 284114

Illustration  ·  Newspapers and Illustrations

The Highlanders capturing Cawnpore 1857 AD by William Heysham Overend. Available as an art print on canvas, photo paper, watercolor board, natural paper, or Japanese paper.
british · history · costumes · india · mutiny · battle · highlanders · uniforms · battery · artillery · attack · capture · sepoys · Private Collection / Bridgeman Images
AR/3D   View in 3D / AR zu Favoriten hinzufügen   Add to favorites    Change wall color    View picture in a room
0 Reviews

Configure art print

Picture Frame

Medium & Stretcher

Glass & Passepartout

Miscellaneous & Extras

 Save / compare configuration
Preview Icon

Summary

Gemälde
Veredelung
Keilrahmen
Museumslizenz

€ 136.87
(inkl. 20% MwSt)
   Add to cart

Bildschärfe: PERFEKT

If you'd like us to adjust the brightness, colors, or crop the image, we're happy to do this for you at no extra cost. Just get in touch!

Similar artworks selected for you

Highlanders Capturing the Mutineers The French in the Malakoff 1855 AD The Zouves assaulting a rifle pit 1855 AD The guards recovering the sandbag battery Capture of a field gun The Insurrection under Arabi Pasha, 1882: The Battle of Tel-El-Kebir, September 13 Second Anglo-Afghan War 1878-1880 British troops storming the Taku Forts in China in 1860 during the Opium Wars The War for the Union - A Bayonet Charge The Stormers dashed over the debris of the breach, illustration from The War for the Union, 1862 - A Bayonet Charge The War for the Union, 1862 – A Bayonet Charge The defence of Dewetsdorp: working a 15 pounder single handed (illustration from After Pretoria: The Guerilla War) Bayonet Charge at Talavera AD 1809 The War for the Union, 1862 - A Bayonet Charge, Harper Attack on Leith, c. 1560, c. 1880 The Terror during the French Revolution: the siege of Toulon from September to December 1793 by the troops of Captain Napoleon Bonaparte against the city allied to the English forces. The War for the Union, 1862—A Bayonet Charge Captain Yorke Leading the Forlorn Hope at Masulipatam, Illustration from Cassell A Handful of Bersaglieri Holding an Advanced Post Were Cut to Pieces Attack of the mutineers on the Redan Battery at Lucknow, 30 July 1857, c1860 China. War of Boxers Battle of Majuba Hill, 1st Boer War, 26-27 February 1881 The War for the Union - A Bayonet Charge Second Battle of Kassassin September 9: Capture of Two Krupp Guns by the Royal Marines Second Franco-Malagasy War (1895) Beritzoka on June 30 The Battle of Salamanca, Illustration from The Defence of Arcot
Show more similar artworks

More art prints by William Heysham Overend

The mutiny at Spithead: hauling down the red flag AD 1797 The mutiny at Spithead: hauling down the red flag on the Reception of Richard on his return from the Continent, illustration from “Cassell The Russian Attack on Sinope, illustration from Cassell’s Illustrated History of England The Football Match, 1890 The attack on the ’Ville de Paris’, 1782, illustration from ’Cassell’s Illustrated History of England’ The Hero of Trafalgar Battle of Navarino: The ’Asia’ engaging the ships of the Capitan Bey and Mohurrem Bey, illustration from ’Cassell’s Illustrated History of England’ Attack on the Carmichael Chinese officers hauling down the British Flag on the Naval Warfare: Working a Ship It was a night attack, and the foe had caught them napping, illustration from Richard I, Coeur de Lion Landing at Jaffa Joppa, September 1191, c1880 About Thirty of the Crew Made a Small Show of Resistance, Illustration from
Show more works by William Heysham Overend

More motifs from the category Newspapers and Illustrations

Francis Russell, 5th Duke of Bedford, Engraved by W. T. Mote The Battle of San Romano, c.1438-40 A Meeting of Umbrellas, pub. 1782 Scene from the Battle of Solferino: Fighting in the Cemetery Plate 4 from Caricature of Felix Mendelssohn The Disaster at Koornspruit: Driverless Teams Stampeding The Summer Duck of Catesby, 1749-73 A Philosopher: Conduit Street, pub. 1796 A Wedding on a Bicycle, front cover illustration from Pen sketches of tavern scenes Two-Penny Whist, published by Hannah Humphrey in 1796 The Capture of Ping Yang, illustration from The Trees and the Woodman, illustration from
View More from "Newspapers and Illustrations"

A selection of our top sellers

Illustration from Edgar Allan Poe Caresses, 1896 Uttewalde Valley Boy with a Crow The Dream of the Fisherman Starry Night, c. 1850-65 The Tree of Life (central panel) Path in the Wheat at Pourville, 1882 The Garden of Earthly Delights, inner left wing (Paradise) Sistine Chapel Ceiling: Creation of Adam, detail of the outstretched arms, 1510 fresco after restoration The Youth of Bacchus, 1884. Judith Beheading Holofernes Open Window, Collioure Woman on the Beach, 1908 Faculty Painting Medicine
Show more artworks


What our customers think about us


Frequently Asked Questions about Meisterdrucke


Personalizing your art print at Meisterdrucke is simple and intuitive: Choose a frame, set the image size, pick a printing medium, and add suitable glazing or a stretcher frame. We also offer additional customization options like mats, fillets, and spacers. If you have any questions, our customer service team is ready to help you create your perfect artwork.

At Meisterdrucke, you can visualize your configured artwork directly in your own room. Simply upload a photo of your space and see how the artwork looks in it. If you're visiting us on a mobile device — phone or tablet — our augmented reality feature brings the picture to life and projects it right into your room. A unique experience that combines art and technology.

Choosing the right medium is often a matter of personal taste. To give you a better idea, we've provided some images for each medium. We also offer a sample set of all paper variants, so you can decide not just visually but by touch as well. You can order the sample set free of charge — only shipping costs apply.

Don't worry! At Meisterdrucke, we don't just process orders mechanically. Every order is manually reviewed by our team. If we spot any inconsistencies or issues with your configuration, we'll get in touch with you right away. And of course, our friendly and patient support team is always here to help you with your configuration. We'll work with you by phone or email to adjust your image so the final result is exactly what you had in mind.


Still have questions?

Are you interested in an art print from our manufactory but still unsure? Do you need advice on choosing the medium or help with the order?

Our experts are happy to assist you.

+43 4257 29415
support@meisterdrucke.com
Mo-Do: 7:00 - 16:00 | Fr: 7:00 - 13:00

Still have questions?

Are you interested in an art print from our manufactory but still unsure? Do you need advice on choosing the medium or help with the order?

Our experts are happy to assist you.

+43 4257 29415
support@meisterdrucke.com
Mo-Do: 7:00 - 16:00 | Fr: 7:00 - 13:00

Meisterdrucke

   Kärntner Strasse 46
        9586 Finkenstein am Faaker See
        Austria
        +43 4257 29415
        support@meisterdrucke.com
Other languages

                   
Erfahrungen & Bewertungen zu Meisterdrucke
Post.at DHL Express Quehenberger Cargoboard
Kaiser Franz Joseph

Meisterdrucke
Kärntner Strasse 46
9586 Finkenstein am Faaker See · Austria
+43 4257 29415 · support@meisterdrucke.com
Post.at DHL Express Quehenberger Cargoboard


(c) 2026 meisterdrucke.ie