-
 ×
×
- Home
- Art Prints ▸
- Artists ▸
- Categories ▸
- Art Styles ▸
-
Picture Frame ▸
- All decorative frames
- Baroque decorative frames
- Simple decorative frames
- Rustic decorative frames
- Floating frames
- Golden decorative frames
- Silver decorative frames
- White decorative frames
- Black decorative frames
- Wood-look decorative frames
- Shabby chic decorative frames
- Thin decorative frames
- Thick decorative frames
-
Print Media ▸
- All print media
- Canvas Leonardo (satin)
- Canvas Salvador (matte)
- Canvas Raphael (matte)
- FineArt Photo Matte
- FineArt Photo Satin
- FineArt Photo Baryte
- FineArt Photo Glossy
- Watercolor Paper Munch
- Watercolor Paper Renoir
- Watercolor Paper Turner
- Watercolor Paper Dürer
- Natural Line Hemp
- Natural Line Rice
- Kozo White, 110g
- Kozo Natural, 110g
- Inbe White, 125g
- Unryu, 55g
- Bamboo, 110g
- Premio Unryu, 165g
- Murakumo Natural, 42g
- Bizan Natural, 300g
- Bizan White, 300g
- Aluminum composite 3mm
- Acrylic glass 5mm
- Order Sample Set
- Which print medium is right for you?
Canvas
Photo Paper
Watercolor Board
Natural Line
Japanese Paper
Special Media
More information
-
Help & Service ▸
- Contact us
- Sell your art
- Frequently Asked Questions
- Job Openings
- Complaint
- Order Samples
- Order Vouchers
- Shipping costs
- Production time
- Sustainability
- Image research
- Special requests
- Who are we?
- Pricing policy
- Company policy
- Quality promise
- Stretcher frame
- Mats
- Decorative frames
- Glazing
- Fillets
- Mounting systems
- Print media
- Care tips
- Legal Notice
- Terms & Conditions
- Privacy Policy
- Right of Cancellation
Info & Service
More information
Good to know
Legal information
- Shop ▸
- Contact





 View in 3D / AR
 Add to favorites
 Change wall color
 View picture in a room
.jpg "The Battle of Malden AD991, 1920s")
.jpg "The Battle of Maldon, 991, illustration from")
.jpg "The Battle of Stirling Castle")
.jpg "The Battle of Stirling Bridge, 11 September 1297, c1880")
_Ridley_-_The_collapse_of_the_bridge_during_the_Battle_of_Stirling_Bridge_in_1297_engraved_-_(MeisterDrucke-1087297).jpg "The collapse of the bridge during the Battle of Stirling Bridge, in 1297 (engraved by Roberts)")
.jpg "The English Passing The Somme")
.jpg "King Penda Slain at Winwaedfield AD655, 1920")
.jpg "The Battle of Lake Trasimenus 217 BC")
.jpg "The Macedonians Crossing the Jaxartes")
.jpg "The Battle of Towton, illustration from")
.jpg "Crusaders in Battle")
.jpg "Capture of Calais by the French Under the Duke of Guise, 1558, 1890")
.jpg "The Battle of Bannockburn, 24th June 1314")
.jpg "Plate XII from \"The Stolen Pail\"")
.jpg "Election Riot at Hawick, 1837, illustration from")
.jpg "The Landing of Marshal Schomberg at Carrickfergus AD 1689")
.jpg "The Battle of Towton in 1461, illustration from Hutchinsons")
.jpg "Xerxes Crossing The Hellespont")
.jpg "Illustration from")
.jpg "Rudolf of Swabia Mortally Wounded, 1882")
.jpg "King Penda Slain at Winwaedfield, 655, Illustration from")
.jpg "Edward II Gathered an Army and Fought a Battle at Bannockburn 1314 AD, Where Bruce Defeated the English")
.jpg "Sevastopol: The retreat over the bridge of boats")
.jpg "Sortie of Zrinyi during the defence of Szigetvar against the Turks, 1566, 1825")
.jpg "The Battle of Towton, 29 March 1461")
.jpg "The Battle of Ellandun, 825 AD, illustration from")
.jpg "Episode in Battle of Palestro, May 31")
.jpg "The Battle of Rossbach, 1882")
.jpg "Charge of the Scots at Homildon Hill AD 1402")
.jpg "The great battle of Brunanburh (illustration from")
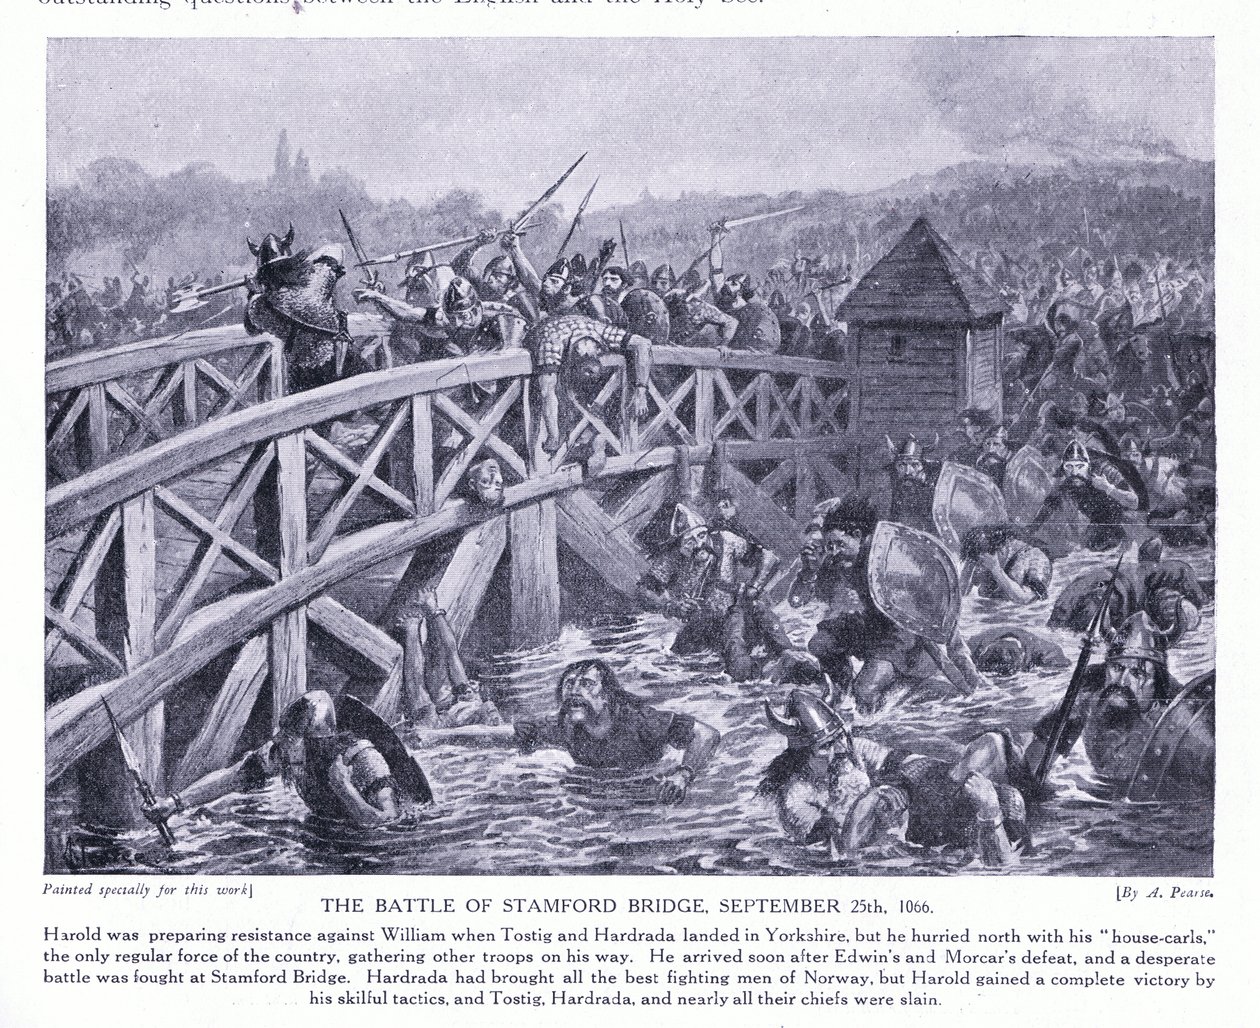
.jpg "The Battle of Stamford Bridge AD1066")
.jpg "The siege of Delhi: Storming the breach")
.jpg "Temporary Lieutenant G. St. G. S. Cather bringing in a wounded man in full view of the enemy and under machine-gun and artillery fire")
.jpg "Acting-Sergeant Raynes putting his smoke-helmet on Sergeant Ayres following the explosion of a gas-shell")
.jpg "Nicholsons defeat of the rebels at Najafgarh, 2nd August 1857")
_-_(MeisterDrucke-1090161).jpg "The Smugglers")
.jpg "The Great Battle of Brunanburgh AD 937")
.jpg "The Massacre of St. Brice")
.jpg "The massacre of St Brice")
.jpg "Robert Taken Prisoner at Tinchebral, 1106, Illustration from")
.jpg "Robert taken at Tinchebrai AD1106, 1920")
.jpg "Captain A.M. Inglis brings his tank forward over very difficult ground after one of its wheels had been blown off, illustration from")
.jpg "A Handful of Bersaglieri Holding an Advanced Post Were Cut to Pieces")
.jpg "Sapper W. Hackett Refuses to Leave a Comrade Who Was Lying Seriously Injured in a Mine Gallery")
.jpg "The Luncheon: Monet")
.jpg "Nocturne in Black and Gold, the Falling Rocket")
.jpg "Hunters, 1816")
.jpg "Autumn Sun and Trees")
.jpg "Head of a Skeleton with a Burning Cigarette")
.jpg "The Japanese Footbridge and the Water Lily Pool, Giverny")
.jpg "Reduced Weight")
 - (MeisterDrucke-2603).jpg "The Tower of Babel (Rotterdam)")
.jpg "Port Light")
.jpg "Woman in White Stockings, c.1861")
.jpg "Pandora")
.jpg "The Jack Pine")
.jpg "Christ in the Wilderness")
.jpg "The Great Day of His Wrath")
.jpg "Reclining Nude")

 +43 4257 29415
 support@meisterdrucke.com
 Mo-Do: 7:00 - 16:00 | Fr: 7:00 - 13:00