support@meisterdrucke.com  ·  0043 4257 29415

Deutsch English Italiano Español Français Nederlands Português Svenska Polski Dansk
Search by artist, work title or style – e.g. Monet, Starry Night, Impressionism, Hokusai wave, nude. Describe the scene – e.g. green meadow, abstract with lots of red, dark oil painting, standing nude next to a tree.

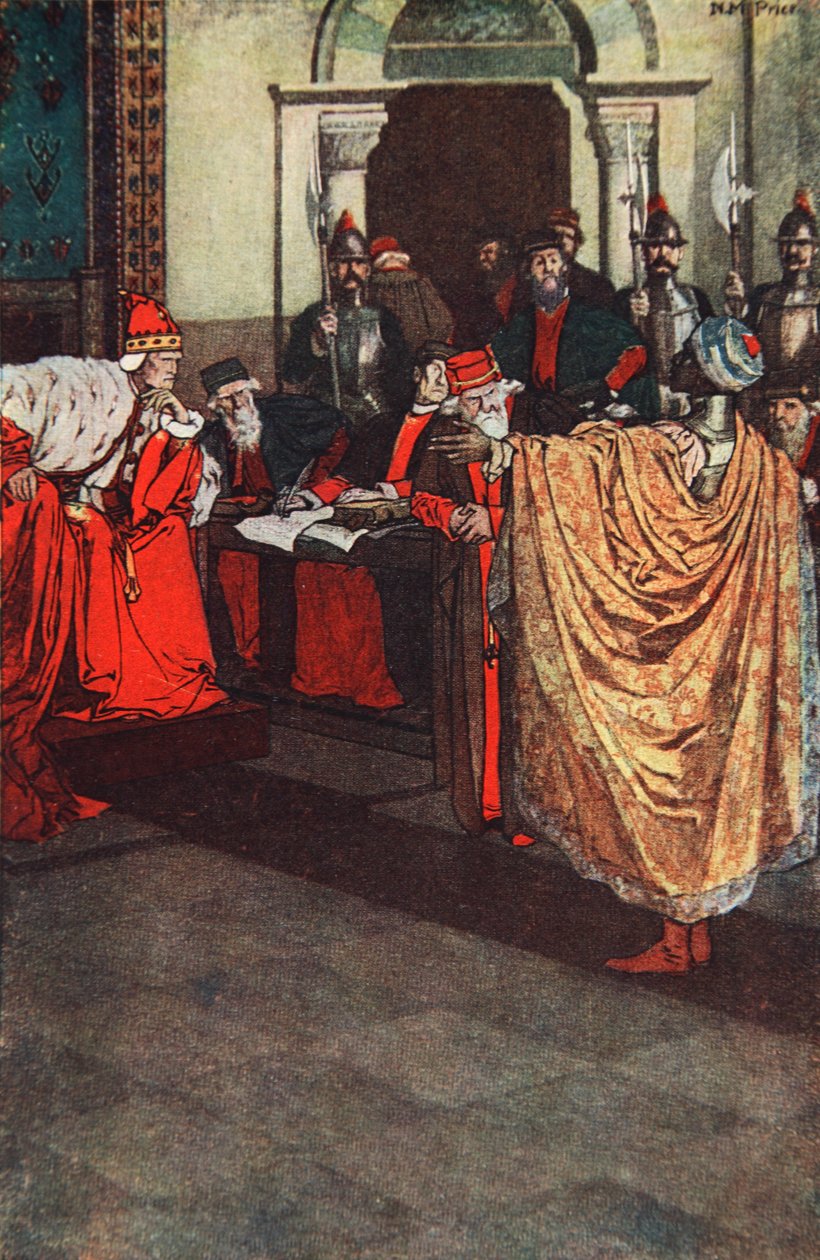
'She loved me for the dangers that had passed', Othello, Act I Scene 3, illustration from 'Tales from Shakespeare' by Charles and Mary Lamb by Norman Mills (after) Price

'She loved me for the dangers that had passed', Othello, Act I Scene 3, illustration from 'Tales from Shakespeare' by Charles and Mary Lamb


Norman Mills (after) Price

€ 142.35
Includes 13.5% VAT
   Configure art print
1905  ·  colour lithograph  ·  Image ID: 1412540

Nonclassified artists

'She loved me for the dangers that had passed', Othello, Act I Scene 3, illustration from 'Tales from Shakespeare' by Charles and Mary Lamb by Norman Mills (after) Price. Available as an art print on canvas, photo paper, watercolor board, natural paper, or Japanese paper.
shakespeare william (1564-1616) · william shakespeare · venice · venetian · italy · italian · italians · european union · europe · european · veneto · venice · costume · moor · costumes · guards · story · character · play · theatre · tragedy · soldiers · speech · characters · friends · listening · doge · shakespearean · Private Collection / Bridgeman Images
Other color versions of this image  
AR/3D   View in 3D / AR zu Favoriten hinzufügen   Add to favorites    Change wall color    View picture in a room
0 Reviews

Configure art print

Picture Frame

Medium & Stretcher

Glass & Passepartout

Miscellaneous & Extras

 Save / compare configuration
Preview Icon

Summary

Gemälde
Veredelung
Keilrahmen
Museumslizenz

€ 142.35
(inkl. 20% MwSt)
   Add to cart

Bildschärfe: PERFEKT

If you'd like us to adjust the brightness, colors, or crop the image, we're happy to do this for you at no extra cost. Just get in touch!

Similar artworks selected for you

Cosimo de Medici, Grand Duke of Tuscany, Defending Against Accusation of His Enemies The Merchant of Venice Richard II abdicates Richard II Abdicates, 1399, c1850 Assembly of Worms: Deposition of Louis I the Debonnaire by his Sons Louis VI dit Le Gros gave the postage charters of the communes "Give me my money and let me go," said Shylock (The Merchant of Venice), from Tales from Shakespeare pub. by Ward Lock & Co Ltd Abdication of King Richard II of England in 1399 in favour of his cousin Henry (Henry IV of England) Barbarossa Pleads for Help from Henry the Lion The King pays court to the English leaders, c. 1066, 1864 Louis VII the Younger (1120-1180), King of France, leaving for the 3rd Crusade with Alienor of Aquitaine (1122-1204), also Eleanor of Guyenne, entrusts the powers of regency to the wise scholar Suger, abbot of the Abbey of Saint-Denis near Paris. Drawing Signature of “the Great Charter” by King John Lackland (1167-1216) (“Magna Carta”) at Runnymede on 15 June 1215 The page presents his prisoner Edward I of England acknowledged as suzerain of Scotland, 1290, 1864 Bayard presented to Henry VIII, illustration from William (1027-87) granting a charter to the City of London, illustration from Postcard with a scene from Tannhauser by Richard Wagner Edward acknowledged as suzerain of Scotland, 1290, from A Chronicle of England BC 55 to AD 1485, pub. London, 1863 Jocelyn, Bishop of Glasgow, at Northampton, 1176, Illustration from William I, the Conqueror, King of England, c1067 19th century The Page Presents His Prisoner, Illustration from Bayard presented to the king of England (Henry VIII) Lord Thomas Fitzgerald throws down his sword, illustration from King John of England signs the Magna Carta. From: Pictures of English History, 1868 Charlemagne Dictating His Capitulars to His Minister Alcuin Shylock speaks in The Merchant of Venice, Act IV, Scene I, William granting a charter to the City of London, illustration from
Show more similar artworks

Similar artworks selected for you

Cosimo de Medici, Grand Duke of Tuscany, Defending Against Accusation of His Enemies The Merchant of Venice Richard II abdicates Richard II Abdicates, 1399, c1850 Assembly of Worms: Deposition of Louis I the Debonnaire by his Sons Louis VI dit Le Gros gave the postage charters of the communes "Give me my money and let me go," said Shylock (The Merchant of Venice), from Tales from Shakespeare pub. by Ward Lock & Co Ltd Abdication of King Richard II of England in 1399 in favour of his cousin Henry (Henry IV of England) Barbarossa Pleads for Help from Henry the Lion The King pays court to the English leaders, c. 1066, 1864 Louis VII the Younger (1120-1180), King of France, leaving for the 3rd Crusade with Alienor of Aquitaine (1122-1204), also Eleanor of Guyenne, entrusts the powers of regency to the wise scholar Suger, abbot of the Abbey of Saint-Denis near Paris. Drawing Signature of “the Great Charter” by King John Lackland (1167-1216) (“Magna Carta”) at Runnymede on 15 June 1215 The page presents his prisoner Edward I of England acknowledged as suzerain of Scotland, 1290, 1864 Bayard presented to Henry VIII, illustration from William (1027-87) granting a charter to the City of London, illustration from Postcard with a scene from Tannhauser by Richard Wagner Edward acknowledged as suzerain of Scotland, 1290, from A Chronicle of England BC 55 to AD 1485, pub. London, 1863 Jocelyn, Bishop of Glasgow, at Northampton, 1176, Illustration from William I, the Conqueror, King of England, c1067 19th century The Page Presents His Prisoner, Illustration from Bayard presented to the king of England (Henry VIII) Lord Thomas Fitzgerald throws down his sword, illustration from King John of England signs the Magna Carta. From: Pictures of English History, 1868 Charlemagne Dictating His Capitulars to His Minister Alcuin Shylock speaks in The Merchant of Venice, Act IV, Scene I, William granting a charter to the City of London, illustration from
Show more similar artworks

More art prints by Norman Mills (after) Price

The Gentle Katherine, The Taming of the Shrew, Act II Scene 1, illustration from ’Tales from Shakespeare’ by Charles and Mary Lamb Barefooted came the Beggar-Maid before the King Cophetua, illustration from The Children’s Tennyson: Stories in Prose and Verse from Alfred Lord Tennyson by May Byron Romeo and Juliet, Act V Scene 3, illustration from ’Tales from Shakespeare’ by Charles and Mary Lamb Geraint Had Never Seen So Fair and Sweet a Lady, Illustration from He felt her tears upon his hand, illustration from The Weird Sisters, Macbeth, Act IV Scene 1, illustration from Imogen Titania sleeps, Midsummer Nights Dream, Act II Scene 2, illustration from The Feast Vanished Away, The Tempest Act III, Scene 3, Illustration from My Lord, I thank you for your entertainment, illustration from
Show more works by Norman Mills (after) Price

More art prints by Norman Mills (after) Price

The Gentle Katherine, The Taming of the Shrew, Act II Scene 1, illustration from ’Tales from Shakespeare’ by Charles and Mary Lamb Barefooted came the Beggar-Maid before the King Cophetua, illustration from The Children’s Tennyson: Stories in Prose and Verse from Alfred Lord Tennyson by May Byron Romeo and Juliet, Act V Scene 3, illustration from ’Tales from Shakespeare’ by Charles and Mary Lamb Geraint Had Never Seen So Fair and Sweet a Lady, Illustration from He felt her tears upon his hand, illustration from The Weird Sisters, Macbeth, Act IV Scene 1, illustration from Imogen Titania sleeps, Midsummer Nights Dream, Act II Scene 2, illustration from The Feast Vanished Away, The Tempest Act III, Scene 3, Illustration from My Lord, I thank you for your entertainment, illustration from
Show more works by Norman Mills (after) Price

A selection of our top sellers

View of Houses in Delft, Known as The Little Street Flowers on the windowsill Schubert at the Piano Witches Colored Leaves at Kaianji Temple, 1837-1844 Monkey in a Persimmon Tree, 1935 Pandemonium, 1841 Kneeling Woman in an Orange-Red Dress Woman with a Veil, 1915 Sunlight in the Blue Room Rosa Damascena, Rosier de Cels, from Les Roses, 1817-24 The Entrance to the Grand Canal, Venice, ca 1730 The Garden of Earthly Delights Keelmen Heaving in Coals by Moonlight Danae, 1891
Show more artworks

A selection of our top sellers

View of Houses in Delft, Known as The Little Street Flowers on the windowsill Schubert at the Piano Witches Colored Leaves at Kaianji Temple, 1837-1844 Monkey in a Persimmon Tree, 1935 Pandemonium, 1841 Kneeling Woman in an Orange-Red Dress Woman with a Veil, 1915 Sunlight in the Blue Room Rosa Damascena, Rosier de Cels, from Les Roses, 1817-24 The Entrance to the Grand Canal, Venice, ca 1730 The Garden of Earthly Delights Keelmen Heaving in Coals by Moonlight Danae, 1891
Show more artworks


What our customers think about us


Frequently Asked Questions about Meisterdrucke


Personalizing your art print at Meisterdrucke is simple and intuitive: Choose a frame, set the image size, pick a printing medium, and add suitable glazing or a stretcher frame. We also offer additional customization options like mats, fillets, and spacers. If you have any questions, our customer service team is ready to help you create your perfect artwork.

At Meisterdrucke, you can visualize your configured artwork directly in your own room. Simply upload a photo of your space and see how the artwork looks in it. If you're visiting us on a mobile device — phone or tablet — our augmented reality feature brings the picture to life and projects it right into your room. A unique experience that combines art and technology.

Choosing the right medium is often a matter of personal taste. To give you a better idea, we've provided some images for each medium. We also offer a sample set of all paper variants, so you can decide not just visually but by touch as well. You can order the sample set free of charge — only shipping costs apply.

Don't worry! At Meisterdrucke, we don't just process orders mechanically. Every order is manually reviewed by our team. If we spot any inconsistencies or issues with your configuration, we'll get in touch with you right away. And of course, our friendly and patient support team is always here to help you with your configuration. We'll work with you by phone or email to adjust your image so the final result is exactly what you had in mind.


Still have questions?

Are you interested in an art print from our manufactory but still unsure? Do you need advice on choosing the medium or help with the order?

Our experts are happy to assist you.

+43 4257 29415
support@meisterdrucke.com
Mo-Do: 7:00 - 16:00 | Fr: 7:00 - 13:00

Still have questions?

Are you interested in an art print from our manufactory but still unsure? Do you need advice on choosing the medium or help with the order?

Our experts are happy to assist you.

+43 4257 29415
support@meisterdrucke.com
Mo-Do: 7:00 - 16:00 | Fr: 7:00 - 13:00


Meisterdrucke

   Kärntner Strasse 46
        9586 Finkenstein am Faaker See
        Austria
        +43 4257 29415
        support@meisterdrucke.com
Other languages

                   
Erfahrungen & Bewertungen zu Meisterdrucke
Post.at DHL Express Quehenberger Cargoboard
Kaiser Franz Joseph

Meisterdrucke
Kärntner Strasse 46
9586 Finkenstein am Faaker See · Austria
+43 4257 29415 · support@meisterdrucke.com
Post.at DHL Express Quehenberger Cargoboard


(c) 2026 meisterdrucke.ie