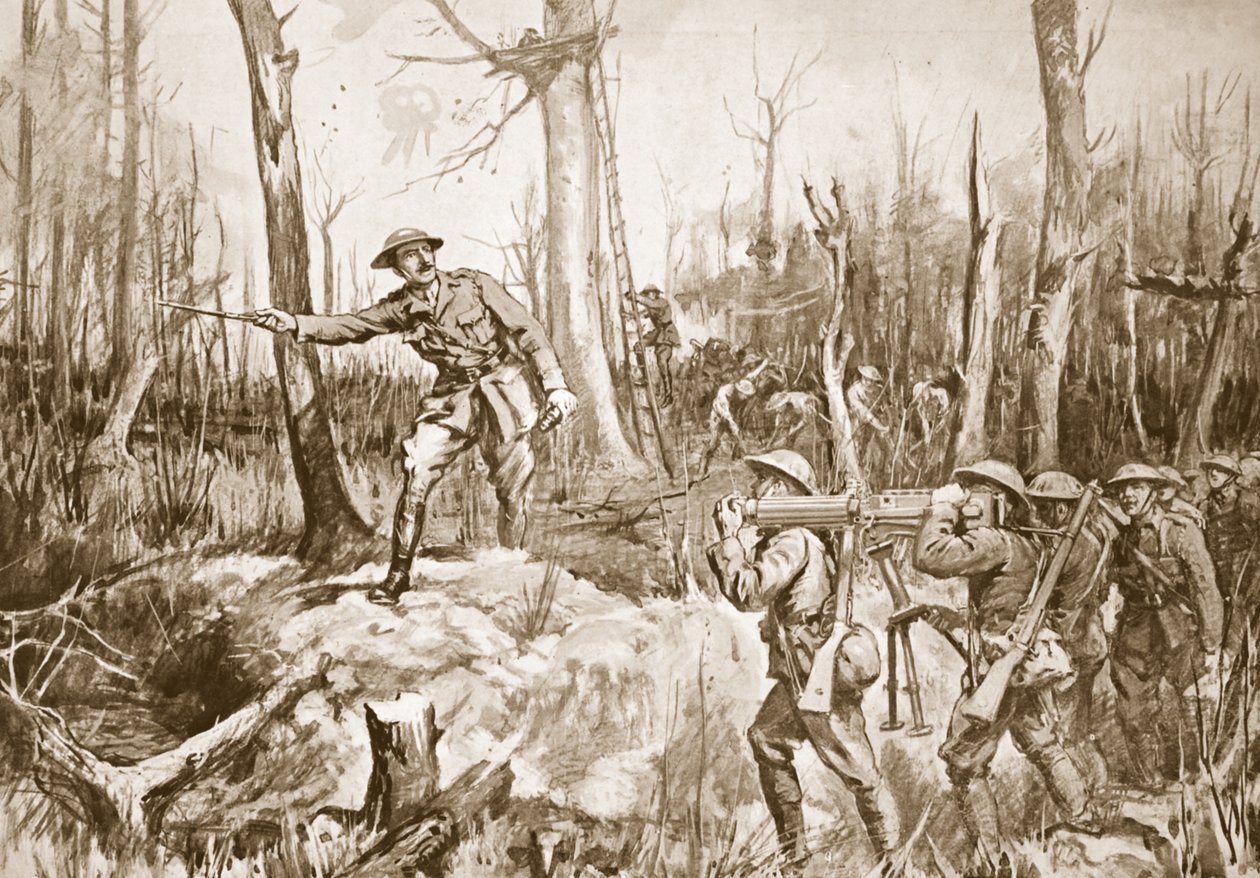
Captain (Temporary Lieutenant-Colonel) R.B. Barker Organizing the Defences of a Wood by Margaret Dovaston

Captain (Temporary Lieutenant-Colonel) R.B. Barker Organizing the Defences of a Wood

(Captain (Temporary Lieutenant-Colonel) R.B. Barker organizing the defences of a wood (litho))


Margaret Dovaston

€ 137.32
Enthält 13.5% MwSt.
   Configure art print
Undated  ·  lithograph  ·  Picture ID: 1550248

Nonclassified artists

Captain (Temporary Lieutenant-Colonel) R.B. Barker Organizing the Defences of a Wood by Margaret Dovaston. Available as an art print on canvas, photo paper, watercolor board, uncoated paper or Japanese paper.
weapon · battle · battlefield · courage · first world war (1914-1918) · illustration · dovaston margaret (1884-1954) · illustrator · soldier · heroism · hero · british army · weapon · trenches · trench warfare · great war · deeds of valour · royal fusiliers · brave · world war one · soldiers · world war i · courage · first world war · randle barnett barker · Engraving · Mzengraving · / Bridgeman Images
AR/3D   View in 3D / AR zu Favoriten hinzufügen   Add to favorites    Select wall color    View painting in a room
0 Reviews

Configure art print

Picture Frame

Medium & Stretcher

Glass & Passepartout

Miscellaneous & Extras

 Save / compare configuration
Preview Icon

Summary

Gemälde
Veredelung
Keilrahmen
Museumslizenz

€ 137.32
(inkl. 20% MwSt)
   Add to cart

Bildschärfe: PERFEKT

Should you desire adjustments to brightness and color, or a custom crop of the motif, we are happy to make these changes at no additional cost to you. Please do not hesitate to contact us.

Similar artworks selected for you

Major (Temporary Lieutenant-Colonel) A.F. Douglas-Hamilton Rallies his Men and Leads them Forward, thus Checking the Enemy Lieutenant (Temporary Lieutenant-Colonel) R.B. Bradford, MC, rallies the men of another battalion and leads them forward with his own battalion Driving the Afghans from their mountain fastnesses Advance of the British Force in the Ashanti Campaign, 1873 The Attack on Game Tree Fort, Illustration from Private J. Miller staggers back, mortally wounded, with the answer to a message and falls at the feet of an officer on delivering it Captain W. Allen Assisting Men Wounded by the Explosion of Ammunition after Being Himself Wounded British Soldiers in a German Trench, Western Front, First World War, c1915, c1920 Second-Lieutenant Hallowes encouraging his men as he lay mortally wounded Lieutenant Colonel Driant and his Chasseurs battalions defending the Bois des Caures, Verdun, front cover illustration from From the Battle in the Vosges Sergeant H. Wells Leading a Platoon Towards the German Wire Entanglements After His Officer Had Been Killed Private J. Hutchinson shooting two German sentries when leading an attack on a German trench Rising of the Peasants of Dalecarlia Second-Lieutenant Turner Leading a Bombing Attack Down a German Communication Trench Private B R Shiel Awarded DCM for Capturing a German Patroller in Belgium April 1915 Lieutenant Geary Hurrying Under Heavy Shell-Fire Second-Lieutenant Dallas-Moor rallies a detachment which had momentarily broken before a furious Turkish assault Fighting a road through the forest on the way to Coomassie To The Memory of Brave Men. The Last Stand of Major Wilson on the Shanghai River, 1893, 1900 Acting-Lance-Corporal Barker assisting a party, collected by him, to open out a communication trench under heavy shell and machine-gun fire Skirmish in the woods outside Paris Lieutenant Forshaw Throwing Bombs Continuously, Gallipoli, First World War Advance of the British forces in the Ashanti campaign of 1873 Fighting a Road Through the Forest on the Way to Coomassie British troops retaking a trench at Zillebeke captured by the enemy The Dreadful Hollows That Led to Oppy Wood, British Bombers Working Along the German Trenches The victorious skirmish of July 16 in Alto Posina, without waiting for the enemy
Show more similar artworks

Other art prints by Margaret Dovaston

A Phoenician Sacrifice to Moloch, illustration from The massacre of the Scythian chiefs by Cyaxares the Mede A Phoenician Sacrifice to Moloch A Hittite Prince in Syria, illustration from Sergeant Spence won a DCM for leading his platoon in a bayonet charge in woods near Wasmes in August 2014 Lance-Corporal Royall attending to the wounded in a wayside inn which was under fire Human Sacrifice by Druids, illustration from Edgar the Peaceable holding a naval review, illustration from The Battle of Orchomenos, illustration from Alfonso I John Manlius paying a soldier The Head of Donald Macwilliam Presented to Alexander II, Illustration from Marriage of Assyrian Princess to Kara-Indash, the King of Babylon, illustration from The Madness of King Ceolred of Mercia AD 716
Discover more works by Margaret Dovaston

Excerpt from our top sellers

Supper at Emmaus The Alexander Mosaic, depicting the Battle of Issus between Alexander the Great and Darius III in 333 BC, Roman floor mosaic removed from the Casa del Fauno Lunch The Soup, Version II Emilie Floege Hylas and the Nymphs The Palace of the Queen of the Night, Set Design for Attersee The Mountain Mowers, First Version The Grand Canal, Venice, Looking Southeast, with the Campo della Carità to the Right, 1730s Small Garden Ghost Winter, 1573 Lake Thun with Symmetrical Reflection Forest of Fontainebleau View from a Window Landscape Scene from Thanatopsis
Show More Artworks


What our customers think about us


Frequently Asked Questions about Meisterdrucke


Personalizing your art print at Meisterdrucke is a simple and intuitive process that allows you to design an artwork exactly to your specifications: Choose a frame, determine the image size, decide on a printing medium, and add suitable glazing or a stretcher frame. We also offer customization options such as mats, fillets, and spacers. Our customer service is available to help you design your perfect artwork.

At Meisterdrucke, you have the fascinating option to visualize the artwork you configured directly in your own space. For a tailored preview, simply upload a photo of your room and let the artwork appear on it. If you visit us via a mobile device, be it a phone or tablet, our augmented reality feature brings the image to life and seamlessly projects it into your space. An experience that uniquely combines art and technology.

Choosing the medium is often a matter of personal taste. To give you a clearer idea, we have provided some images for each medium. For a holistic experience, we also offer you a sample set of all paper variants so you can make a decision not just visually but also haptically. You can take advantage of the sample set free of charge – only the shipping costs will apply. You can order the sample set directly.

Do not worry. At Meisterdrucke, we do not proceed mechanically. We manually review each order. If there are any inconsistencies or peculiarities in the configuration, we will immediately contact you. Of course, our courteous and patient support is always at your side to assist you with the configuration. Together with you, we adjust your image by phone or email so that the final result exactly meets your expectations.


Do you have any questions?

Are you interested in an art print from our manufactory but still unsure? Do you need advice on choosing the medium or help with the order?

Our experts are happy to assist you.

+43 4257 29415
support@meisterdrucke.com
Mo-Do: 7:00 - 16:00 | Fr: 7:00 - 13:00

Do you have any questions?

Are you interested in an art print from our manufactory but still unsure? Do you need advice on choosing the medium or help with the order?

Our experts are happy to assist you.

+43 4257 29415
support@meisterdrucke.com
Mo-Do: 7:00 - 16:00 | Fr: 7:00 - 13:00


Meisterdrucke

   Kärntner Strasse 46
        9586 Finkenstein am Faaker See
        Austria
        +43 4257 29415
        support@meisterdrucke.com
Other languages

                   
Erfahrungen & Bewertungen zu Meisterdrucke
Post.at DHL Express Quehenberger Cargoboard
Kaiser Franz Joseph

Meisterdrucke
Kärntner Strasse 46
9586 Finkenstein am Faaker See · Austria
+43 4257 29415 · office@meisterdrucke.com
Post.at DHL Express Quehenberger Cargoboard


Meisterdrucke 2716 Bewertungen auf ProvenExpert.com

(c) 2025 meisterdrucke.ie